Microblog : A very long article Wikipedia article on the orientation of toilet paper [7 jun à 22:52] [R]

Mardi, 21 juillet 2020

Roll through the Dungeon

Traduction: [ Google | Babelfish ]

Catégories : [ Jeux ]

A couple of months ago, I discovered D100 Dungeon, a free print-and-play (at least up to version 2.2) dungeon crawling game where most aspects of the game are randomly generated by rolling dice. While it is yet-another game where you walk into a room, kill the monster and loot the treasure, I was especially enthusiastic about generating the dungeon's map randomly (look at the pictures on BoardGameGeek, some people have taken the time to even make very nice looking maps) I've played a few games before feeling the itch to design such a game myself (game design is something that has been itching every now and then, but without much result until now).

Roll through the Dungeon (RttD) is the result of scratching that itch. The structure of the game is very much inspired by D100 Dungeon, but I changed some of the mechanisms that I didn't like with what I consider better ones.

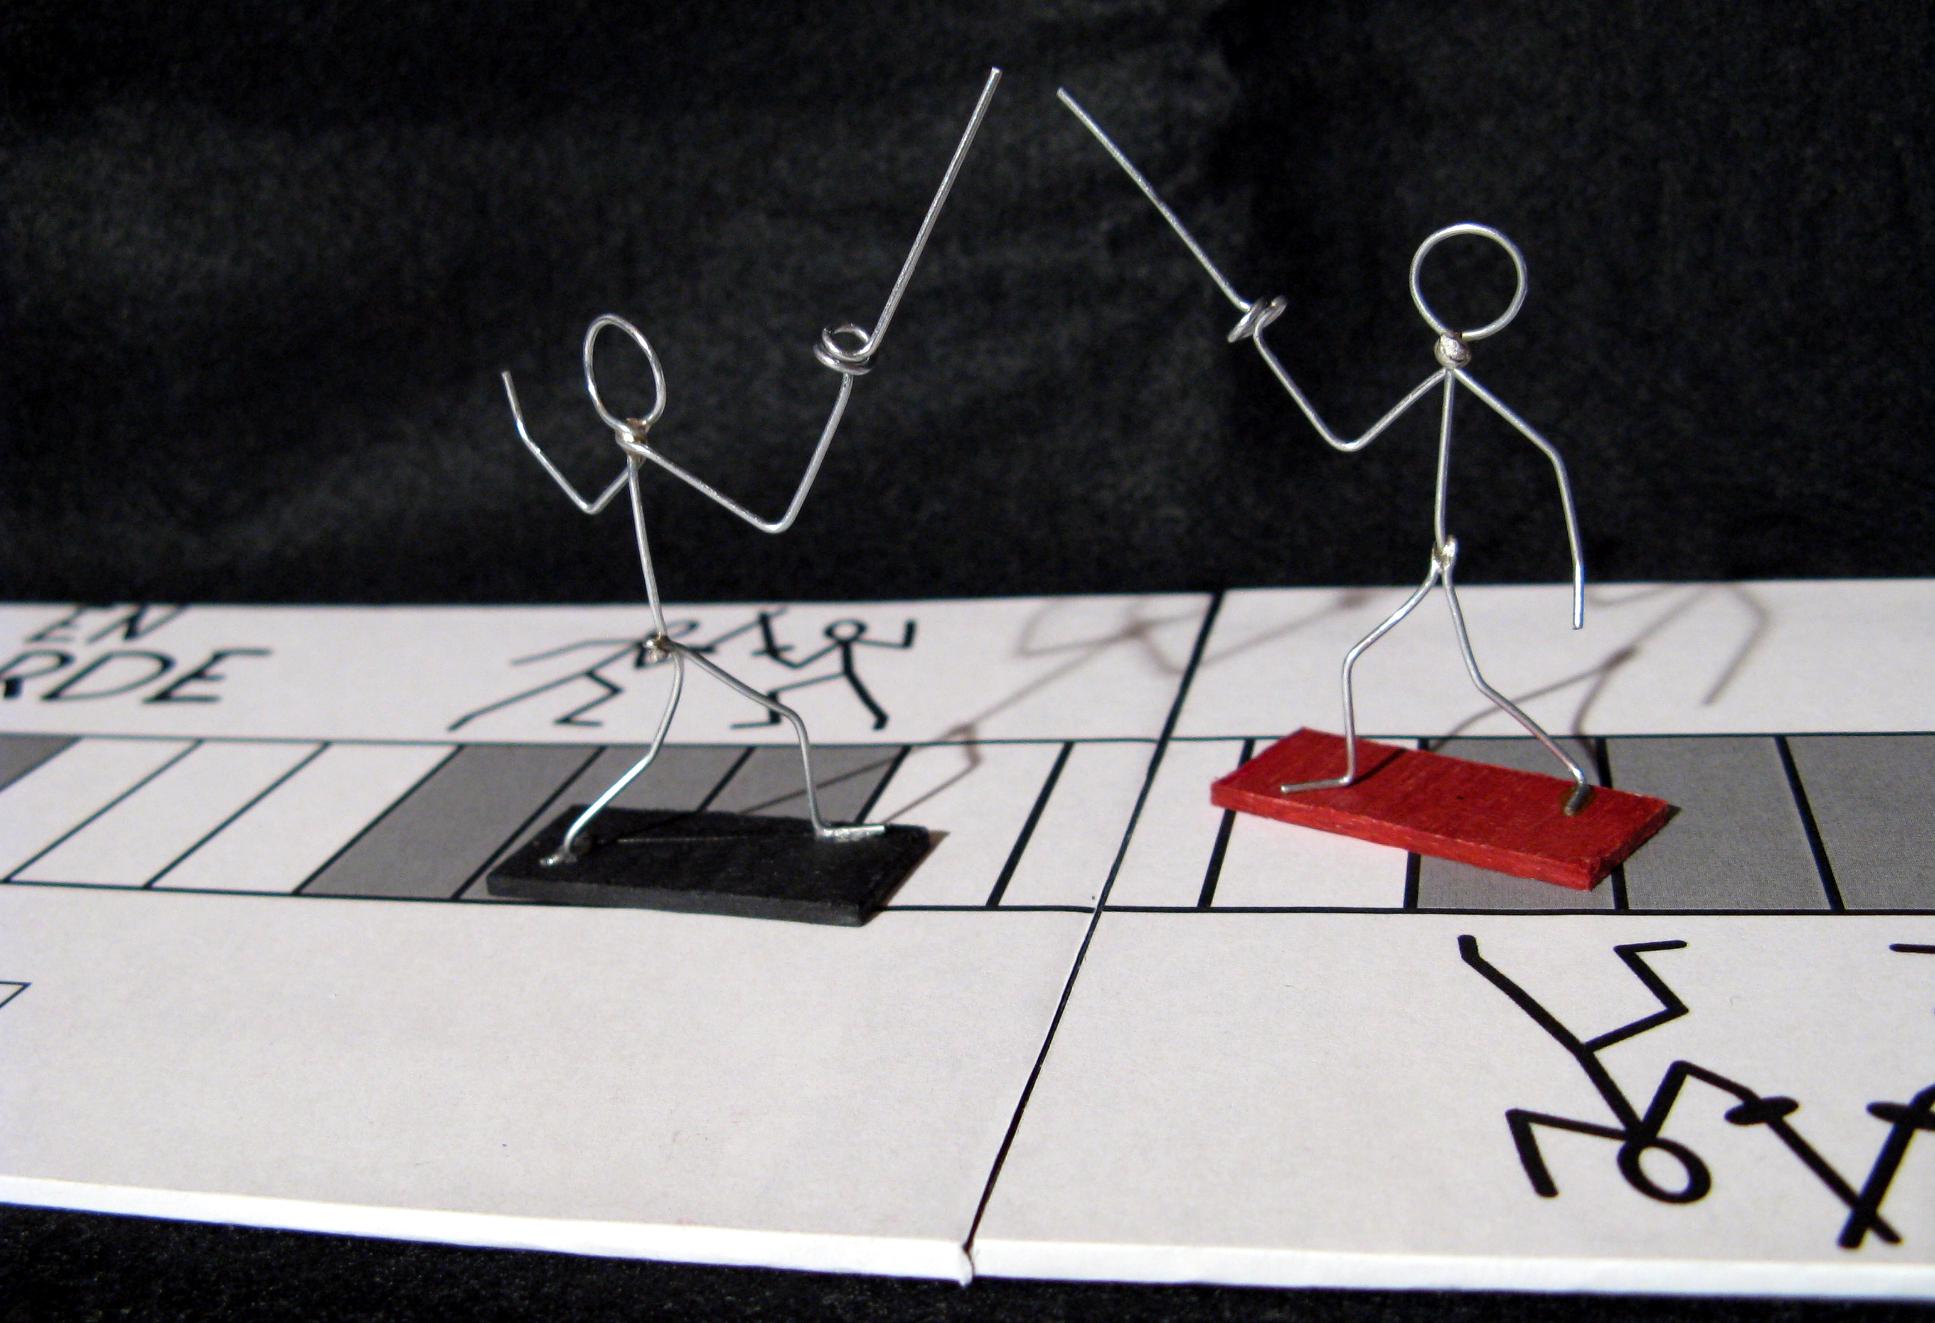
Inspired by the James Bond 007 role-playing game I played as a teenager in the early '90s, skill tests have an associated success grade, indicating how well your character succeeds in doing a given action. This success grade then determines how much time is spent on doing the action, and in case of fights, how much damage is inflicted to the opponent. This contrasts with D100 Dungeon's two-step fights, where the skill test tells you whether you have hit the opponent, but an second, unrelated roll determines the damage. I find it more intellectually satisfactory that the damage depends on how successful the action has been, rather than being an independent event, but I am aware it is nothing more than a design decision and it does not model reality any better than the two-step model. I'm particularly proud of the nomogram I have designed for computing the success grade, but I must admit that it is actually not very practical (the table is much faster to use, as it does not require manipulating a ruler). But I did it for fun, and that is the kind of geeky stuff I consider fun :)

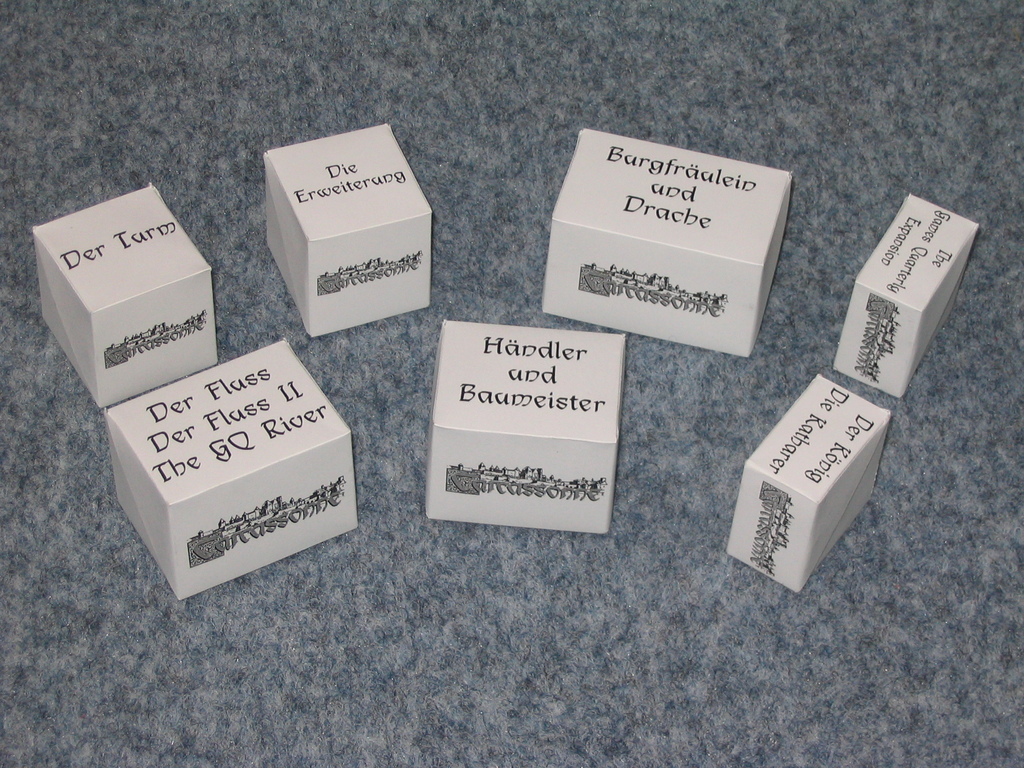
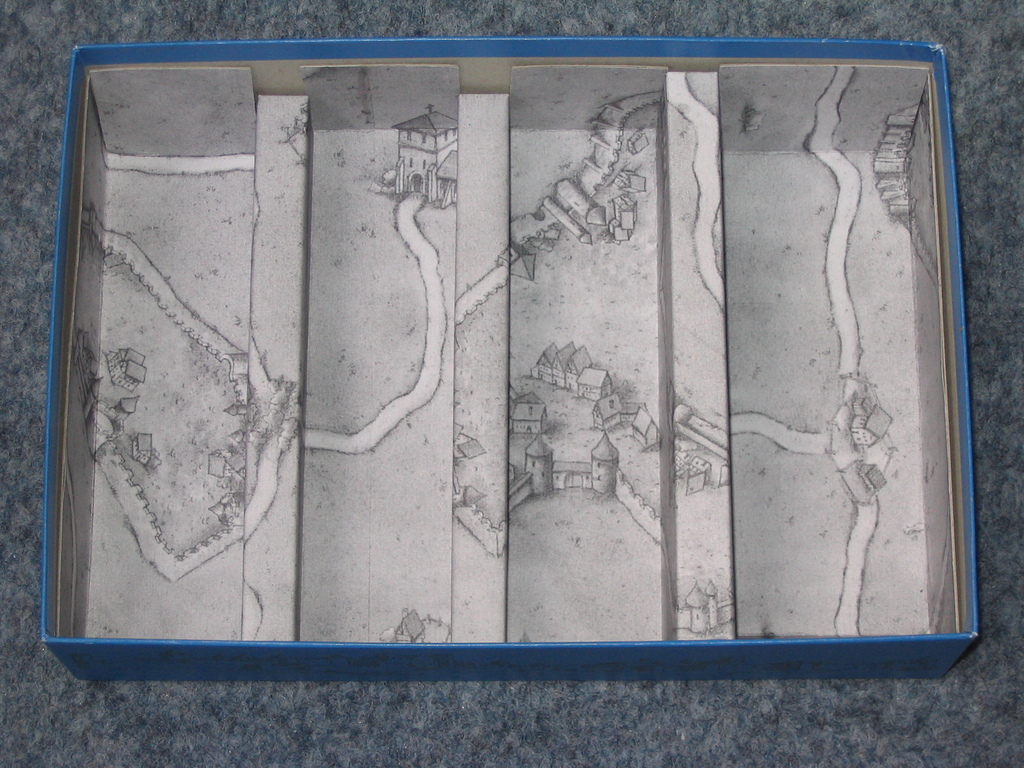
Another important difference between D100 Dungeon and RttD is the construction of the dungeon's map. The map is a grid of adjacent squares rooms, and in the former game, a single D100 roll determines most of the characteristics in a square: the three exits from the room (corridor, door or wall) and what you find in it (a feature, a monster or nothing). This leads to paradoxical maps, where on one side of a room is a door, but the same side seen from the adjacent room is a solid wall. RttD solves this at the cost of more dice rolls: room sides are determined by independent D10 rolls, and the room's content is yet another roll. That means that you need to roll up to four D10 instead of one D100.

Many design decisions from D100 Dungeon have become apparent when trying to solve the same problems, and have led to the same solutions, reinforcing the similarity between the two games: roll tables are ordered, with the not-go-good stuff at the beginning of the table, and the best stuff at its end. This way, it is possible to get better stuff in some circumstances by offsetting the dice roll (i.e., adding 10 to the D100 roll). This is especially important when searching the rooms: feature rooms may contain a trap, so when searching a feature room, you add 5 to your roll to make it impossible to find a second trap in the same room, as well as increasing the chances to find better stuff.

The hardest thing for me in working on this game has been (and still is) to invent thematic elements, such as monsters, quests, room features, treasures. I tried not to simply copy D100 Dungeon (partly because it's copyrighted, and partly because I wanted to prove myself that I could do it), but it has been really hard. Most monsters and features are coming straight from the NetHack wiki, monster HP and damage are generated by a script to create a progression in the difficulty, but the hardest has been (and still is) quests. Some are more or less direct adaptations from the quests in D100 Dungeon, a few are from my own imagination (especially in the “Ridicule does not kill” they say chapter), but the list of quests is still incomplete (actually, it's the only thing that justifies not releasing a version 1.0 of the game).

I have now played about 25 games of RttD to test the game, fix the problems and try and improve it. I'm a bit sad to say that the novelty is wearing off and that the game feels quite repetitive (it is, by design). What has been the most fun until now has been to use LaTeX again to produce the PDF booklet and to develop macros for generating some parts of the tables and making cross-references. It is nothing fancy, but as a software developer, it's the kind of things I enjoy doing.

I feel like running out of steam about RttD so I don't know how long I will continue working on it; certainly I won't anymore spend several hours daily as I have in the beginning. But as the game is released under Creative Commons BY – SA, anyone can work on it, write changes, and generally improve it. The PDF booklet has a section about developing the game, if you are interested. Among the things that are not implemented yet are curses and blessings (which D100 Dungeon already has), I was considering making them more like NetHacks curses i.e., items you find may be cursed and detrimental to your character if worn or used.

[ Posté le 21 juillet 2020 à 12:40 | pas de commentaire | ]

Vendredi, 18 juillet 2014

Circuit auto été 2014

Catégories : [ Jeux ]

circuit_auto_ete_2014

Voici le circuit millésime juillet 2014, tout en virages, il n'est pas facile à parcourir. Cette année, les voitures rouge et bleue sont devenues poussives vers la fin des vacances. Difficile de savoir si le problème vient d'un mauvais contact entre les rails et la voiture, des balais ou d'un frottement mécanique (au niveau de l'axe du moteur ?). Un patin de la rouge s'est percé à force de frotter contre les rails, je l'ai réparé en y mettant un peu d'étain à souder (et comme il s'agit d'un alliage à 60% de plomb, ça doit polluer un peu en prime…)

[ Posté le 18 juillet 2014 à 13:22 | pas de commentaire | ]

Mercredi, 9 mai 2012

Super Mario Dice

Catégories : [ Jeux ]

super_mario_dice-all

Je me suis récemment intéressé aux jeux de dés, et j'ai découvert Zombie Dice. Le principe est très simple, le jeu est rapide, mais le thème ne me plaisait pas. Alors j'ai décidé de changer le thème en Super Mario. J'avais d'abord songé au Super Mario Bros. original tournant sur NES, mais je trouvais les graphismes de la réédition pour SNES (Super Mario All Stars) nettement plus beaux, et donc j'ai repris les graphiques de cette version là.

super_mario_dice-dice

Les dés viennent de blankdice.co.uk, chez qui j'ai déjà acheté un certain nombre de dés. Les faces ont un léger creux, qui permettent de coller un autocollant carré de 14,5 mm de coté. J'ai imprimé sur un autocollant au format A4 et découpé les carrés avec un cutter rotatif sans trop appuyer, ce qui permet de couper l'autocollant sans couper le papier-support et donc de décoller les petits autocollants bien plus facilement.

super_mario_dice-track

Zombie Dice est vendu sous blister et ne comprend qu'un gros gobelet et 13 dés. Il nécessite quelque chose pour marquer le score (papier/crayon, jetons…) J'ai donc fabriqué une piste pliante de 13 cases plus une case départ, encore une fois en imprimant sur un autocollant A4. À la place du gobelet, je vais fabriquer un sac en tissu, assez grand pour contenir tous les composants (il reste à trouver le tissu).

Une amie m'a proposé de fabriquer des pions en forme de personnages de Super Mario en échange de quoi je lui fabrique quelques copies du jeu. On verra ce que ça donne.

[ Posté le 9 mai 2012 à 18:28 | 3 commentaires | ]

Jeudi, 5 janvier 2012

Circuit auto Noël 2011

Catégories : [ Jeux ]

circuit_auto_noel_2011

Pas de circuit auto l'été passé, mais j'en ai monté un pendant ces vacances. Composé essentiellement de virages, j'ai réussi à en faire le tour en (un peu) moins de 4 secondes.

[ Posté le 5 janvier 2012 à 19:46 | pas de commentaire | ]

Jeudi, 30 décembre 2010

Circuit auto Noël 2010

Catégories : [ Jeux ]

circuit_noel_2010

Un circuit compact cette fois-ci, car la place habituelle que j'utilise pour monter le circuit est occupée par le sapin de Noël. Grande innovation cependant cette fois-ci, l'ajout du compte tours électronique.

[ Posté le 30 décembre 2010 à 13:27 | 4 commentaires | ]

Mercredi, 21 juillet 2010

Hacker un circuit auto Tyco

Catégories : [ Bricolage | Jeux ]

Le circuit auto est alimenté par un transformateur 12 V/6 W. Le problème, c'est que la tension délivrée baisse lorsqu'on lui demande de débiter davantage de courant, et donc que lorsque deux voitures roulent ensemble, leur accélérations ne sont terribles. De plus, lorsqu'une voiture sort de la piste, le transformateur n'a besoin de débiter que la moitié du courant, la tension augmente brusquement et la voiture restante accélère soudainement. Si elle est en entrée de virage, elle sort de la piste aussitôt.

J'ai donc utilisé une alimentation stabilisée à la place du transformateur, et tous ce problèmes s'envolent (évidemment, les fabricants de jouets ne sont pas prêts à remplacer un petit transformateur à 5 EUR par une alim à 150 EUR). J'ai d'abord règlé l'alim sur 12 V, mais les résultats n'étaient pas terribles. Après quelques essais, j'ai découvert qu'une voiture roulant à fond (j'en ai mise une sur cales pour les tests) recevait 17 V. J'ai donc réglé l'alim sur environ 16 volts, et là ça marche drôlement bien.

Une voiture consomme environ 300 mA dans les virages, et peut consommer brièvement jusqu'à 700 mA quand on accélère à fond. Et quand on utilise deux voitures en même temps, les deux peuvent accélérer à fond au besoin. Aussi, fini les sorties de pistes provoquées par la sortie de l'autre voiture. Que du bonheur.

Prochaine étape, construction d'un compte-tours/chronomètre éléctronique à base d'Arduino. J'ai déjà les diodes IR et les phototransistors, mais l'Arduino et l'écran LCD alphanumériques sont restés à la maison.

[ Posté le 21 juillet 2010 à 19:28 | pas de commentaire | ]

Lundi, 19 juillet 2010

Circuit auto 2010

Catégories : [ Jeux ]

Circuit_Auto_2010

Il y a deux ans, j'avais ressorti mon vieux circuit auto. Cette année, Emma me l'a redemandé, on en a donc construit un nouveau.

Je me suis rendu compte que les deux voitures d'origine ne fonctionnaient pas très bien dans le looping : l'avant de la carosserie frottait contre la piste et les roues avant ne touchaient plus le sol, ce qui faisait que la voiture restait parfois accrochée sur une mauvaise jonction entre deux rails et sortait de la piste. J'ai donc limé l'avant de la carosserie, et maintenant ça marche beaucoup mieux.

J'ai aussi expérimenté un looping « carré » avec des lignes droite entre chaque quart de looping, mais la voiture noire n'a pas assez de tenue de route pour rouler tête en bas.

[ Posté le 19 juillet 2010 à 15:58 | 1 commentaire | ]

Jeudi, 26 février 2009

En Garde

Catégories : [ Bricolage | Jeux ]

En_Garde-contenu

Knizia a publié en 1993 En Garde, un jeu de cartes qui simule un duel d'escrime. Il a été réimplémenté en 2004 sous le nom de Duell avec quelques cartes supplémentaires, puis réédité en 2008, mais payer 30 EUR (ou 20 pour l'édition de voyage) pour 25 cartes numérotées de 1 à 5, un plateau de 23 cases et 2 pions, ça me paraît de l'abus. Je ne suis pas un artiste, mais pour essayer si le jeu est bien je me suis dit que je pourrais bien fabriquer les composants moi-même.

En_Garde-plateau_cartes_pions

Les dessins sur les cartes viennent des cartes de l'édition 2008, d'où j'ai simplement relevé la position des deux bretteurs sous forme de bonshommes « bâtons ». Les cartes ont été imprimées à grand'peine sur des feuilles microperforées.

En_Garde-cartes_speciales

Le texte des cartes spéciales est une traduction de l'espagnol vers l'anglais à partir de d'une autre version faite maison.

En_Garde-plateau_plie

Le plateau est collé à la colle en aérosol sur du carton gris de 2 mm. Les deux moitiés sont assemblées par du gaffer's tape. Il est un peu raté, les deux moitiées ne s'assemblent pas correctement. La prochaine fois, je devrai couper la surface du plateau après collage seulement.

En_Garde-pion

Les pions sont fabriqués à partir de fil de fer zingué de 0,9 mm de diamètre. La tête et les bras sont d'une partie, le tronc une deuxième et les jambes une troisième, et ont été soudées ensemble avec un fer à souder. Le socle est en carton colorié au feutre. J'ai d'abord collé les bonshommes à la cyanoacrylate sur le carton, mais ils n'ont pas tenu, je les ai recollés à la colle universelle transparente (sans eau).

En_Garde-pions_sur_boite En_Garde-pions_sur_plateau

En_Garde-boite

La boite est en carton gris d'1,5 mm. Les coins sont assemblés avec de la bande adhésive transparente de base (qui ne tient pas bien), et la couverture est collée encore une fois à la colle en aérosol.

En_Garde-regles_cartes

Les règles sont copiées de la version de Chris Lawson publiée sur le web.

[ Posté le 26 février 2009 à 10:22 | pas de commentaire | ]

Samedi, 27 septembre 2008

Blue Moon Fonts

Traduction: [ Google | Babelfish ]

Catégories : [ Jeux ]

The font used in the Blue Moon cards (FFG edition) is ITC Kallos, size 12.5pt (or 12pt?) medium and bold, and 8pt book italic for the flavour text.

The font used on the expansion decks' tuckboxes is Bitstream Flareserif.

[ Posté le 27 septembre 2008 à 00:17 | pas de commentaire | ]

Dimanche, 21 septembre 2008

The Phar

Traduction: [ Google | Babelfish ]

Catégories : [ Jeux ]

The Phar is one Blue Moon people that has been mentionned (in Emissaries and Allies: Blessings and in the prologue of the Blue Moon Novel) but never developed as a deck. Their names derives from “Pharao”, so the theme will be Egypt-like. If I ever have a wonderful idea about what features to put in that deck, I'll try to develop it myself.

[ Posté le 21 septembre 2008 à 19:09 | pas de commentaire | ]

Jeudi, 28 août 2008

Caylus: Expansion Cards

Traduction: [ Google | Babelfish ]

Catégories : [ Jeux ]

After some amount of thinking, I decided to remake Dan Rosewater's Guild of Thieves in a way I consider more in the spirit of the game. I also re-made his Hospital and his Trader according to my understanding of the game and in higher resolution, with a proper background text. Printing at 300 dpi should provide a card of the right size.

The Alternate Guild of Thieves

In this alternate version of the Guild of Thieves, the player can trade one or two of his prestige points for one resource or two coins, depending on the variant of the card that is used. The resource or the denier are not stolen from another player, but taken in the common pool. The idea is that theft is bad, therefore it costs one prestige point (and founding the Guild of Thieves is twice as bad, hence the negative prestige points for building it). Players can decide to use either one of the variants, or have both in the game, but once one is built, the other cannot be built anymore.

guild_of_thieves_alt1 guild_of_thieves_alt2

Here is also the source file in XCF format (Gimp's own format).

The Hospice

hospice

The Hospice is a replacement for Dan's Hospital. The design of the card is the same, but the Hospice can be used for trading one resource or two deniers for two points of prestige. In addition to Dan's design, the builder of the Hospice also gains a favour as well as the ten prestige points. The idea here is that the Hospice relies on donations, which are used for taking care of the poor, the elder, the orphans etc. Helping these people is increasing the donator's prestige.

Here is also the source file in XCF format (Gimp's own format).

The Trader

trader

The Trader is the same as Dan's original design, but in higher resolution.

Here is also the source file in XCF format (Gimp's own format).

Card Backs

caylus_back

Here is a copy of the back of the cards, if you want cards that look good from the back too ;) (and the source file as well).

[ Posté le 28 août 2008 à 00:05 | pas de commentaire | ]

Expanding Caylus

Traduction: [ Google | Babelfish ]

Catégories : [ Jeux ]

http://www.boardgamegeek.com/image/178418?size=large

© BoardGameGeek.com

I've been thinking about expanding Caylus by creating new buildings. I've alread made an updated version of Dan Rosewater's guild of thieves and I've considered making more of them, maybe updating Dan's other creations, the Hospital and the Royal Luxury Tailor.

I've made a table showing what buildings allow to change what item for which other one (e.g., the Bank changes money into gold). Basically, only Prestige Points and Favours as a target for change are not very well represented (you can get Favours only by going to the joust field and paying one cloth unit and one denier, while Prestige points can be obtained against cloth, gold or one denier at the taylor's, the jeweller's or the church, respectively.

Thus you can't get prestige or favours in exchange for food, wood or stone. Moreover, prestige is obtained when developing the city (that's in the rules'introduction) and favours seem to be gained when adding culture (theater, statue, monument), teaching (library, university) or entertainment (theater). Favours are very powerful and should not be obtainable just at the cost of one worker.

Therefore I think that the Royal Luxury Taylor as such doesn't fit in the game, since it brings prestige against nothing but one worker, while the Hospital should be renamed Hospice (there was no hospitals in 1289 I think), and bring prestige against one resource (except gold) plus one denier. Hospices where institutins relying on charity for existing, so this makes sense to me.

Now, what would bring Prestige in exchange for food, wood or stone? I thought about the cook for food, the cabinetmaker for wood and the sculptor for stone? The exchange rates have yet to be defined, but I have to keep in mind that food is the easiest to come by, then cloth, then wood and then stone (but this should be studied more in details, because it depends on the number or workers you are ready to invest the the resource gathering process).

Finally, Favours should not easily be obtainable from resources; the joust field and the hospital should remain exceptions.

[ Posté le 28 août 2008 à 00:05 | pas de commentaire | ]

Résolveur de Sudoku

Catégories : [ Jeux ]

J'ai rajouté une option « pas-à-pas » à mon résolveur de Sudoku,suite à la demande de mon (probablement) unique utilisateur.

[ Posté le 28 août 2008 à 00:05 | pas de commentaire | ]

Caylus' Black Market

Traduction: [ Google | Babelfish ]

Catégories : [ Jeux ]

black_market

Jonathan Wu made a new tile for Caylus: the Black Market, following Dan Rosewater's lead on “evil” tiles with his Guild of Thieves. So with my usual lack of imagination and pickiness about details, I made my own version, with a proper, multilingual background. Here's also the source file in XCF format (Gimp's own format).

[ Posté le 28 août 2008 à 00:05 | pas de commentaire | ]

Mercredi, 27 août 2008

Caylus – La guilde des voleurs

Catégories : [ Bricolage | Jeux ]

caylus_guild_of_thieves

Dan Rosewater a crée un nouveau bâtiment pour Caylus intitulé la guilde des voleurs, qui a cela de particulier qu'elle coûte des points à construire, mais permet de voler une ressource ou un denier (selon la version utilisée) à un des adversaires.

Seulement voila, les images sont disponibles seulement en faible résolution, et en plus il a utilisé la carte « Résidence » sans enlever le texte du fond de la carte. Alors je me suis dit que je peux faire mieux, et voila : les deux versions en 300 DPI et avec le texte approprié en filigrane.

Voici aussi une version en pdf imprimable immédiatement à la bonne taille, ainsi que le fichier original au format natif de Gimp (xcf).

[ Posté le 27 août 2008 à 23:55 | pas de commentaire | ]

Dice Tower Pieces

Traduction: [ Google | Babelfish ]

Catégories : [ Bricolage | Jeux ]

Dice_Tower_Pieces

Thanks to Reijo and Antti, I managed to get all the pieces for my dice tower cut out of wood. After sanding, glueing and again sanding, its core should be ready. Then I'll just need to add a cover and a tray. The assembly is not trivial, because the side angles of the pieces are not exactly 90°, Antti's plane is a bit crooked since he dropped it :(

Below are pictures of the pieces put together as they need to be glued later.

Dice_Tower_together_1 Dice_Tower_together_2 Dice_Tower_together_3 Dice_Tower_together_4 Dice_Tower_together_5

[ Posté le 27 août 2008 à 23:54 | pas de commentaire | ]

Vendredi, 8 août 2008

Circuit auto

Catégories : [ Jeux ]

Circuit_Auto

J'au ressorti mon vieux circuit auto (TYCO) qui doit avoir plus de 20 ans (je me souviens que j'étais en train d'y jouer quand on a annoncé à la télé la chute du mur de Berlin, c'était en 1989). Un coup de papier de verre sur les contacts et sur la piste, et ça repart. Le fonctionnement est des plus simple (un transformateur 220 – 12 V, deux rhéostats, et un petit moteur éléctrique à courant continu dans chaque voiture), il n'y a pas beaucoup de place pour une panne. Les voitures d'origine sont un peu poussives, mais la dernière que j'avais achetée fonctionne très bien. Le circuit sur la photo est le circuit de base (California GT) que j'ai modifié à l'aide de la boite d'extensions (Le défi de la route). Est-ce que les jouets vendus en 2008 fonctionneront encore en 2028 ?

[ Posté le 8 août 2008 à 21:01 | 1 commentaire | ]

Samedi, 1er septembre 2007

Dice Tower, Part 1

Traduction: [ Google | Babelfish ]

Catégories : [ Bricolage | Jeux ]

Dice_tower_3D_plan

I've decided to build a dice tower. Not the same as everybody else is building (not that it's not good, I'm just being posh there), but a tower where the dice roll in every direction, instead of in only one vertical plan. Drawing the plan took two evenings and a bit of a headache for the middle part, but it's done and the plan looks correct. The core is going to be 36cm tall with a 12x12cm base.

For the building, I've decided to carve it out of polyurethane foam. I've bought a can of liquid PU foam, and I'll have to make three cubes out of it. I'll use a cardboard box as a form, and carve the cubes with saw and knife. The I'll glue the cubes together and add side walls and a tray at the bottom for the dice to roll into when coming out of the tower.

[ Posté le 1er septembre 2007 à 17:10 | 4 commentaires | ]

Vendredi, 17 août 2007

Extensions pour Carcassonne faites-maison

Catégories : [ Bricolage | Jeux ]

La boite de base de Carcassonne coûte 20 Euros, ce qui est raisonnable. Les extensions, en revanche, coûtent 15 Euros chacunes, ce qui rapporté au nombre de pièces qu'elles comportent, coûte le double du jeu de base. J'ai décidé que le prix était abusif, et que je fabriquerai ces extensions moi-même.

Les cartes étaient faciles à fabriquer, il suffit d'imprimer des scans des cartes (obtenus sur BoardGameGeek, il y a des gens assez fondus pour scanner les planches de cartes avant de les découper ! Mais ça m'a grandement facilité la tâche), puis de les coller sur du carton de 2mm d'épaisseur à la colle blanche étalée finement avec une spatule large, puis de couper au cutter. On refait de même pour le dos.

Carcassonne_DIY_meeples2

Les petits pions, en revanche sont moins évidents à fabriquer. J'ai emprunté des exemplaires à un ami qui possède la plupart des extensions, je les ai scanné et obtenu des silhouettes que j'ai ensuite collées sur une baguette de bois de 10 mm d'épaisseur, puis découpé à la scie à chantourner électrique (munie d'une lame torsadée, c'est plus facile qu'avec une lame droite) et poncés.

Ensuite, je les ai peints avec une sous-couche de lasure incolore, deux couches de peinture, puis à nouveau une couche de lasure. Les bleus, verts et le comte en mauve sont peints à la gouache, parce que je n'avais pas les bonnes couleurs en acrylique. Ce fut laborieux car la gouache se redissout dans l'eau même une fois sèche (ce qui n'est pas le cas de l'acrylique), je les ai donc recovertes d'un vernis spécial gouache (mais même l'eau du vernis abimait parfois la couche de gouache. Une horreur.) Les pions pour le sixième joueur sont simplement lasurés avec de l'incolore, ce que je trouve nettement plus beau que l'ignoble gris de l'extension officielle.

Carcassonne_box_top

Restait ensuite à ranger le tout, de préférence dans la boite du jeu de base, qui est essentiellement pleine de vide. Après de nombreuses heures de cogitation, je me suis rendu compte qu'il n'y avait pas assez de place dans la boite pour ranger les cartes dans de petits compartiments qui seraient assez long pour qu'on puisse y glisser les doigts et saisir les cartes. Si je voulais les faire tenir toutes dans la boite et en plus y placer tous les pions, je devais les ranger le plus serré possible.

Carcassonne_box_top_side Carcassonne_all_miniboxes

La seule solution alors pour pouvoir sortir les cartes d'une extension sans difficulté était de placer les cartes de chaque extension dans de petites boites individuelles, faciles à saisir et sortir de la boite.

Il m'a fallu un épisode de Monk et deux épisodes de Murder, She Wrote pour compléter un premier prototype, constité essentiellement de ruban adhésif tellement j'avais plié, coupé, recollé, recoupé et rerecollé.

Les boites portent sur le dessus du couvercle le nom de l'extension (ou des extensions) qu'elles contiennent, et sur l'avant du couvercle le logo Carcassonne. Le fond des boites à l'intérieur portent le nombre de cartes qui doivent y être rangées. Selon la largeur de la boite, le texte et le logo ont été tournés de 90°. Le texte est écrit dans une fonte appelée Lindsay. Comme je ne voulais pas dépenser 30 Euros pour acheter la fonte, j'ai utilisé la possibilité du site MyFont.com d'obtenir des échantillons de n'importe quelle fonte en bitmap. J'ai vectorisé les bitmaps, et j'ai pu ainsi obtenir le texte que je voulais après assemblage.

Carcassonne_minibox1_closed Carcassonne_minibox1_open Carcassonne_minibox2_closed

Carcassonne_box_empty

Enfin j'ai scanné l'image qui se trouve au dos du plateau de décompte des points et je l'ai imprimée en plus grand sur trois feuilles A4. J'ai découpé dans du carton de 0.75 mm la forme de l'insert qu'il me fallait, puis j'ai collé à la colle en spray les trois feuilles A4 préalablement ajustées.

[ Posté le 17 août 2007 à 22:59 | 8 commentaires | ]

Mardi, 10 juillet 2007

Caylus: Prestige or Favours?

Traduction: [ Google | Babelfish ]

Catégories : [ Jeux ]

http://www.boardgamegeek.com/image/178418?size=large

© BoardGameGeek.com

When thinking about Dan Rosewater's expansion cards for Caylus, I wondered how to decide if a card should bring extra prestige points or rather royal favours?

Reviewing the official cards in Caylus, I came to the following conclusion:

  • You get prestige when you do something that increases your rank in the social hierarchy, when other people in city notice you more, maybe respect you more. In other words, you get prestige when you make yourself look good in the eyes of the others. This can be achieved by expanding the city and the castle of course, but also by making donations to the church, or wearing expensive cloth (made by the tailor) or jewellery (made by the jeweller, if you use this extension card).
  • You get a royal favour when you do something that makes you look good in the eyes of the King, such as promoting education (e.g., building the university), arts and culture (building the theater, the monument), providing entertainment(fighting in the joust field), or flattering the King (building the statue – because I'm pretty sure the statue is a statue of the King).

Then about Dan's cards:

  • The Guild of Thieves: I love the idea, but I think that the card should allow players to trade prestige points in exchange for deniers or resources (how many of them remains yet to be decided). This would be consistent with what I wrote above, i.e., when you do something bad such as using the services of a thief, you loose some amount of prestige. Moreover, those should not be stolen from other players, but taken from the “bank”, i.e., stolen from someone in general. Resource/Denier exchange between players is not a part of the game mechanics, and maybe it should remain so. Finally, it should maybe cost more than one or two prestige points to build, I think. And it also could give its owner a denier e.g., as a tax taken by the guild from its members, when used by another player.
  • The Hospital: I love the idea too, but I think that it should not provide a royal favour to the players, but rather be used for trading any resource or deniers for prestige points. In other words, when you make a donation to the hospital, you get to look good in the eyes of the people in the city. Maybe the hospital would be worth getting a favour when built, though.
  • The Royal Luxury Taylor: this one I hate, because there is already a taylor, and getting prestige for nothing is not in the spirit of the game.
  • The Trader: I somehow like it, but again not really. There are already trader-like buildings in the game, such as at the market, the peddler, the alchemist and the bank. Otherwise, it acts as a resource providing building mixed with the comptoir, providing both resources and deniers, which is something new. I have to think more about it.

[ Posté le 10 juillet 2007 à 11:19 | pas de commentaire | ]

Lundi, 9 juillet 2007

Caylus' Economics

Traduction: [ Google | Babelfish ]

Catégories : [ Jeux ]

http://www.boardgamegeek.com/image/178418?size=large

© BoardGameGeek.com

The resources in Caylus are not equally easy to get when using production facilities such as farms, sawmills, quarries etc. We can then find what are their respective values based on their scarcity and by extension, we can derive the values of the deniers and of the pretige point.

Values of Resources

If we consider that all the production facilities have been built, we can count how many resources are produced by each of them (when an alternative is possible, such as in the wooden farms, we consider only half of the number of resources; resources gained by the owner of stone buildings are not taken into account) and calculate values of the resources relative to each other. Here are the results:

  • Gold: 100.0 (reference value)
  • Food: 18.3
  • Wood: 18.3
  • Stone: 20.2
  • Cloth: 25.3

Food and wood have the same value, stone is worth 10% more than the two previous ones, cloth is worth 38% more than food and wood, and 25% more than stone, and gold is worth the most, as expected.

Deniers

So, how much are deniers worth? It depends a lot where you spend them or where from you get them.

At the bank, one denier is worth 50.0 or 40.0, depending on the amount you change.

At the neutral market, its worth 4.6, 5.1, 6.3 or 25.0, depending on the kind of resource you trade, respectively food/wood, stone, cloth or gold. At the wooden market, these values are respectively 3.1, 3.4, 4.2 or 16.7.

At the neutral peddler, it's worth 9.2, 10.1, or 12.7 for food/wood, stone or cloth, respectively. At the wooden peddler, the values are respectively 18.3, 20.2 or 25.3.

Prestige Points

The taylor changes cloth into prestige points, with a rate of one cloth turned into two points. This sets the prestige point's value to 12.7.

The jeweller sets the value of the prestige point to 20.0 or 22.2, depending on how much gold is spent at once.

The church sets the prestige point to 2.1-2.5 (with a denier worth 3.1).

Building wooden buildings sets the prestige point to 18.3 (farms, sawmill, quarry), 9.2 (mason, market/peddler built with food), 9.6 (market/peddler built with stone) or 10.9 (notary, market/peddler with cloth).

Building stone buildings sets the prestige point to 12.8 (farm, park, workshop), 6.4 (architect, taylor, bank, alchemist) or 5.7-15.1 (church, depending on how much prestige the favour can be turned into).

Residences are harder to evaluate, since they cost a denier in addition to the cloth, but using the lowest rate of the denier (3.1), it can be set to 14.2.

The points obtained from the construction of prestige buildings are worth as follows: 15.5 (library), 16.0 (cathedral), 14.8-20.0 (monument), 16.3 (hotel), 13.4-18.2 (theater), 13.7-18.6 (university), 14.7 (weaver), 15.5 (granary), 11.7-20 (statue). Some of these buildings also give favours, which can be turned into one to five prestige points, which explains the variable values for the monument, the theatre, the university and the statue.

Finally, building at the castle sets the prestige point's value to 7.1-18.9, depending on which part of the castle is being built and wether you get a favour that can be changed into prestige points because you were the first builder.

Optimization

Now, how do you get the most out of it? This is not the same as rich, since we have seen above that the value of deniers is very much variable depending on who you deal with.

One possibility would be to sell at the market food/wood for deniers, and then buy cloth at the peddler's or even gold at the bank. This allows to change e.g., one food/wood for three cloth or two golds. It's much more interesting than going to the alchemist's (one food/wood for half a gold), except if you can't spend two rounds on the transactions.

Another possibility is to sell wood/food at the wooden market, and then buy prestige points at the church, at a very low cost. This is probably the cheapest way to gain prestige points, but it's quite slow.

With building construction, the best choices are the architect, the taylor, the bank and the alchemist, since they bring prestige points at the lowest cost.

At the castle, the best possibility is to be the first to build a piece of the walls and turn the favour into five prestige points.

Warning

These values are true only when all the production buildings have been built. If some of them are missing, the value of the resources that they are not producing is getting higher and this changes all the calculations. If I have time, I'll make a script that recalculates all these quickly.

[ Posté le 9 juillet 2007 à 00:11 | pas de commentaire | ]

Jeudi, 5 juillet 2007

Fonts

Traduction: [ Google | Babelfish ]

Catégories : [ Jeux ]

Here are the fonts used in game artwork that I have needed for making my own game components. For both games below the fonts were not freely available, but in the case of Caylus a good replacement was available, and for Carcassonne I used MyFonts.com's sample text rendition to get words or pieces of words, and then I used potrace to trace a vector contour and save the words in EPS. This gives the possibility to change the size of the words without any of the aliasing problems that occur when resizing a bitmap. Assembling the words or pieces of words to make titles was annoying, but that's better than nothing.

Caylus

The offcial one is Engraver's Old English.

Replacement fonts, available for free:

Carcassonne

The font is very similar, although not identical to Lindsay, and has no known free equivalent. Lindsay is thinner, its legs are a bit longer and has no serif on e.g., the left leg of its “n”.

[ Posté le 5 juillet 2007 à 11:53 | pas de commentaire | ]

Samedi, 4 novembre 2006

Les extensions « Rivière » pour Carcassonne

Catégories : [ Bricolage | Jeux ]

http://www.carcassonne.de/familie.htm

© Hans im Glück Verlag

Carcassonne est un jeu de société où les joueurs construisent une carte en assemblant des carreaux tirés au hasard représentant des parties de ville, de route, de champ et des monastères. Le jeu dispose de plusieurs extensions (hors de prix comparées au jeu de base), mais aussi de deux extensions gratuites à fabriquer soi-même : la rivière et la rivière 2. La rivière se construit avant le début du jeu proprement dit, donc ses carreaux ne sont pas mélangés à ceux du jeu de base, et n'ont pas besoin d'être identiques.

carcassonne-riviere

Pour commencer, on peut télécharger les avers des carreaux sur le site du jeu (chercher les liens « Der Fluss » et « Der Fluss II »), puis imprimer les carreaux (qui sont au format PDF, en couleur). J'ai ensuite découpé les bords blancs, puis coupé chaque planche en deux parties (plus facile à coller). J'ai collé chaque demi-planche sur du carton de 2 mm d'épaisseur (approximativement l'épaisseur des carreaux originaux) avec de la colle blanche. Le truc, c'est d'encoller le carton (plutôt que le papier) et d'étaler la colle sur toute la surface avec une raclette (par exemple une vieille carte de téléphone), puis de coller le papier. On évite ainsi que le papier ne gondole, et ça sèche en quelques minutes. J'ai ensuite découpé les carreaux au cutter, pour me rendre compte que les marques sur les avers donnent des carreaux légèrement plus grandes que les originales, j'ai donc redécoupé les carreaux en utilisant un carreau du jeu original comme gabarit.

J'ai aussi scanné le revers d'un carreau du jeu de base et je l'ai imprimé en 24 exemplaires pour faire un revers à mes carreaux. J'ai découpé chacun de mes revers, puis je les ai collés un par un au dos de chaque carte, en utilisant la même technique que ci-dessus.

[ Posté le 4 novembre 2006 à 17:15 | 6 commentaires | ]